Hello everyone! Today's tutorial is of a design that I came up with while sorting through my nail polish drawer (it's always a bit easier to get inspired with all of my nail polish laid out). Anyway, this glittery design is fairly easy to do as long as you have a bit of patience!
Step 1.) Paint your nails with a sheer pink-toned polish. I find that this helps make the nails look healthier for designs that leave some of the nail showing.
Step 2.) Follow the chart below to achieve the base design for the glitter:

Frame 1: With a small dotting tool or a toothpick, mark out where the polish will diagonally cross your nail.
Frame 2: Carefully connect the two dots with a slow swipe of a deep rose colored polish. Be sure to wipe off a fair amount of polish from the brush before doing this- accidentally globbing polish will ruin the straight line.
Frame 3: Use a black striper to outline the diagonal line. This will serve as a base for the glitter and also gives you a chance to hide any mistakes.
Step 3.) Follow the chart below to add the glitter:
Frame 1: Pour out a little blob of hexagonal glitter polish on to your worksheet. I used a glitter polish with a clear base, but if you have loose glitter, simply brush some topcoat on top of where you want to place each glitter piece. Anyway, individually place each piece of glitter on the black line with a toothpick.
Frame 2 and 3: I decided to create another diagonal row of glitter parallel to the first. You can skip this step, but I really liked the way two rows looked.
Products Used:
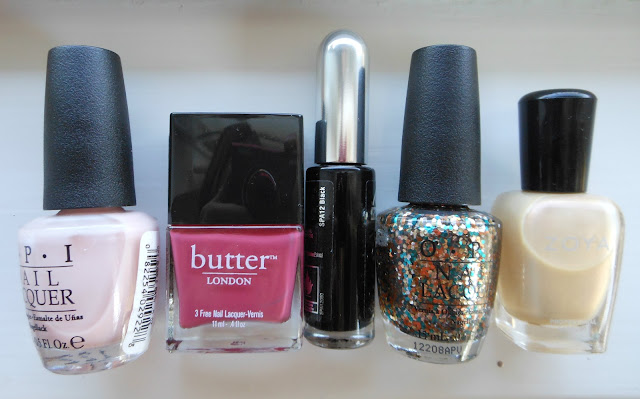
O.P.I "Bubble Bath", Butter London "Dahling", Kiss Nail Art paint in black, O.P.I "The Living Daylights", Zoya "Jolie" (I added a little bit of this discontinued Zoya polish on top of Bubble Bath for some added sheen- if you want to include this step, any sheer metallic nude shade will do).
Also, hooray for super-professional camerawork- you can see me on the Butter London bottle!
Base and Topcoat: Orly Bonder and Seche Vite


No comments:
Post a Comment